
Gutter Guard Installation in New Fairview Texas: How the Covers Go On
J. Riley Roofing & Gutters follows the attachment method that suits the guard, the gutter and the roof edge, and the finished covers are tested with water.
Dial 940-456-9905, to plan a guard installation.
Preparing the Run for a Cover
Gutter Guard Installation begins by emptying the trough, since a cover placed over old debris only traps the problem, and a clean trough shows the true condition of the metal. Dents, sags and bent sections are straightened where possible, since the guard has to sit on a true line, and a straight, level base makes the rest of the work easier.
Matching the Cover to the Gutter
Notes on the slope of the roof help decide how wide a cover should reach, and a guard that is even slightly too narrow will not seat properly. Guards are chosen to match the debris on the roof, the pitch of the slopes, as well as the way the gutter is attached to the house, and you can look at a sample piece.
Installation Without Touching the Roof
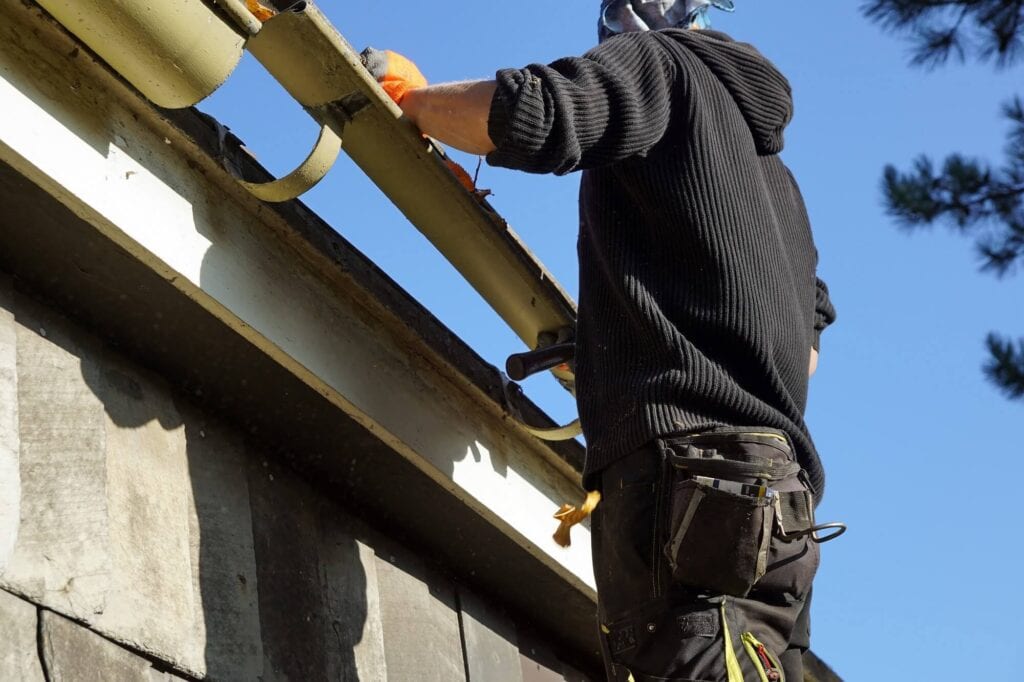
Clip-on guards hook over the front lip of the trough and press down at the back, holding without fasteners through the roof, and this method leaves the shingles undisturbed. Some clip-on covers also screw to the back of the trough or the fascia for extra hold in wind, and a firm fit at both edges holds the cover flat.
Guards That Go Under the Shingles
The roof manufacturer's instructions should be read first, since some roofs have rules about what may be tucked beneath them, and a roofer can advise if there is any doubt. Sealant strips on the shingles may need to be resealed after the guard is slid under, and this method suits some roofs better than others.
The Hardware Behind a Firm Installation
Pilot holes prevent the metal from splitting, and a light touch avoids stripping or over-tightening, and every fastener is checked for a firm grip. Brackets should reach solid wood, so the fascia must be sound along the whole run, and every bracket gets a final check.
Shaping Covers Around Obstacles
Hangers and brackets are notched around, and the cover is kept as flat as the line allows, and gaps at the corners are kept as small as possible. After the cuts are done, the whole run is inspected for sharp edges and gaps, and a quick wipe-down finishes the section.
Dealing With Hangers and Other Obstacles
Old spike-and-ferrule fasteners may poke up through the trough and have to be removed or driven flush, and there should be no gaps beneath it. Some covers need hangers moved or replaced with a low-profile type, which is normal work during an installation, and safety around cables is part of the planning.
Gaps, Gradients and Gentle Adjustments
Gaps at the back, where the cover meets the roof or fascia, let leaves and seeds slip into the trough, and the line of the cover should look straight from the yard. Photographs taken from the ladder show the work as it looks up close, and a tidy appearance usually means the work was done well.
Testing the Covers With a Hose
Downspouts are watched at the bottom to make sure the water is flowing freely through the new system, and the homeowner can watch from the yard. Adjustments, such as a splash guard or a change of angle, are made if the test shows a problem, and honesty about a mismatch is more helpful than a patch.
Fastening That Lets the Cover Breathe
Metal expands in summer heat and shrinks in winter cold, and a long guard has to be allowed to move without buckling, and the gap sizes are small but they matter. The time of day and the temperature during installation are both taken into account, and a flexible attachment prevents stress at the fasteners.
Sectional and One-Piece Gutters, and Guards on Each
Any leaking seam beneath a cover will be hard to see and slow to fix, so it should be sealed first, and a mismatch causes gaps and rattles. If the gutter cannot support a guard, replacing the gutter may be the more sensible course, and unusual houses may need special parts.
Protecting People and Property During the Job
Power lines near the house are a hazard, and the ladder should be kept well away from them, and a helper on the ground steadies the ladder. The crew should clean up the metal shavings and offcuts, which can injure feet and paws, and the crew should be careful with windows and screens.
Closing Out the Job
The ladder marks and any scuffs on siding or trim are checked and, if the crew caused them, put right, and a note about the date of the installation helps later. Look at the guards after the first few rainstorms, watching for overshoot, pooling or debris caught at the edge, and a photograph from the storm helps to explain a problem.
Colors, Finishes and the Look From the Street
A cover that sits flush with the front of the gutter looks neater than one that stands proud of the edge, and the appearance is a matter of taste as much as of function.
When Guard Installation Fits the Calendar
Guard installation usually takes a few hours to a day for an average house, depending on the length of the roof edge, and a call the day before confirms the plan.
The Case for and Against Installing Guards Yourself
Mistakes such as gaps, wrong angles or damaged shingles can cause problems that are hard to see from the ground, and either way, the instructions for the product should be followed closely.
Starting a Conversation About Gutter Guard Installation in New Fairview Texas
To plan Gutter Guard Installation in New Fairview Texas, call J. Riley Roofing & Gutters at 940-456-9905 and describe your gutters, and someone will come out to look at the gutters and the roof edge.