
The Steps Behind Gutter Guard Installation in Rhome Texas
J. Riley Roofing & Gutters follows the attachment method that suits the guard, the gutter and the roof edge, and the crew leaves the roof edge clean.
Speak with us at 940-456-9905, to plan a guard installation.
Preparing the Run for a Cover
Leaking seams are re-sealed while they can still be reached from above, and the whole system is checked as it is cleared. A gutter that cannot be made sound should be replaced, and a guard should not be used to hide its faults, and this is also the time to measure.
Taking Measurements Along the Roof Edge
The width of the trough is measured first, because guards are made for particular sizes such as five-inch and six-inch gutters, and the figures are written down so nothing is guessed. Where a roof edge has little room, a low-profile cover may be needed, and the choice is explained before work begins.
Covers That Grip the Gutter Itself
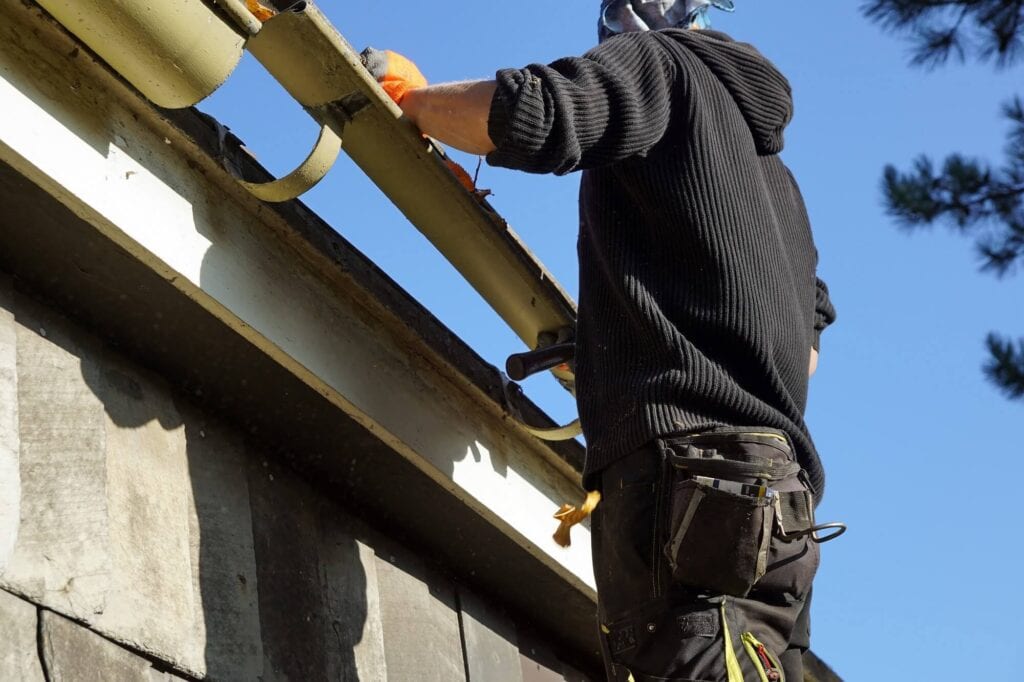
The installer starts at one end and works along the run, pressing each section down until it seats evenly, and the lip of the gutter must be straight for the clips to grip. Some clip-on covers also screw to the back of the trough or the fascia for extra hold in wind, and fasteners should be of a compatible metal.
When the Cover Slides Under the First Course
Some guards slide beneath the lowest row of shingles and rest on the front lip of the trough, and the guard must rest at the right angle to shed water. A cover tucked under shingles lifts them slightly, and nails should not be driven through the roof surface, and a second look at the edge after the work is advisable.
Screw-Down and Fascia-Mounted Covers
Pilot holes prevent the metal from splitting, and a light touch avoids stripping or over-tightening, and the spacing is set by the instructions for the product. Brackets should reach solid wood, so the fascia must be sound along the whole run, and the installer should leave no loose pieces.
Where Guards Meet the Awkward Spots
At inside and outside corners, the cover is cut at an angle so that the two sections meet cleanly, and these details show whether an installation is careful. Metal offcuts are collected immediately, since they can scratch roofs and stain siding, and a quick wipe-down finishes the section.
Clearing Obstacles Along the Run
Old spike-and-ferrule fasteners may poke up through the trough and have to be removed or driven flush, and a careful look along the run shows where problems are hiding. Drain outlets and overflow openings must stay clear and not be blocked by the new cover, and safety around cables is part of the planning.
Making Sure Nothing Can Slip Underneath
The ends of each section should meet or overlap neatly, with no jagged edges, and a flashlight shows gaps that the eye can miss. Photographs taken from the ladder show the work as it looks up close, and the run can be photographed for your records.
The Hose Test After Installation
Downspouts are watched at the bottom to make sure the water is flowing freely through the new system, and the real storm will repeat the test on a larger scale. Any overshoot or pooling should be noted with the date and the weather, so the cause can be worked out, and honesty about a mismatch is more helpful than a patch.
Why Gaps Between Sections Are Deliberate
A cover fastened rigidly at every point may bow, rattle or work loose over the seasons, and a bit of play in the cover is normal. Plastic covers move more than metal ones and can warp if they are installed tight in summer or loose in winter, and a flexible attachment prevents stress at the fasteners.
Different Gutters, Different Details
On a one-piece gutter, the trough is continuous, so the guard can be run along it without crossing many joints, and the guard is chosen to match. A gutter with a lot of corners and bends needs more cutting and more care in placing each piece, and standard covers work for standard gutters.
Working Safely Along the Eaves
Power lines near the house are a hazard, and the ladder should be kept well away from them, and slow, steady work is better than rushing. Tools and offcuts can fall, so the ground beneath the work is kept clear, and the crew should be careful with windows and screens.
Cleanup, Paperwork and Parting Notes
At the end, the installer checks every section of guard and every fastener, and tests the system with water once more, and the final check is the last chance for adjustments. Rinse the surface lightly once in a while, and clear the debris that gathers on top, and small fixes are easiest when they are made early.
Choosing a Finish That Suits the House
Mill-finish metal looks plain, while painted or coated covers can be chosen to match the fascia color, and a quick look at covers on nearby houses helps in choosing.
Planning the Day of the Work
Guard installation usually takes a few hours to a day for an average house, depending on the length of the roof edge, and a call the day before confirms the plan.
Deciding Who Should Be on the Ladder
The work is repetitive and tiring, since every foot of the roof edge has to be reached, cleaned and covered, and the choice is a personal one.
Ready for Gutter Guard Installation in Rhome Texas?
A call to J. Riley Roofing & Gutters at 940-456-9905 is the first step toward Gutter Guard Installation in Rhome Texas, and you get a plain description of how the installation would go.