
Gutter Installation for White Settlement Texas Homes, Step by Step
J. Riley Roofing & Gutters plans each gutter installation as a sequence of steps, each one done in its proper order, and the details are settled before anything is hung.
Call 940-456-9905, and someone will talk through an installation for your home.
The Site Visit and Measurements
Gutter Installation starts on the ground, with a walk around the house to look at every edge of the roof, and the measurements decide how much material is cut. Underground drains, if present, are located before downspouts are connected to them, and the plan is easier to change on paper than on the roof.
What Happens to the Old System
Old downspouts are detached and the brackets taken off the wall, and the exposed fascia is a chance to spot rot or damage. Old nail holes are filled so water cannot find a way behind the new trough, and repairs here are much easier now than after the gutters are up.
Where Level Is Not the Goal
On long runs the high point may be in the middle, with water sloping toward an outlet at each end, and this is the stage where shortcuts show up later. The height of the gutter relative to the roof edge matters, because water must fall into the trough and not run behind it, and the outer lip is a deliberate overflow point.
Metal Coils and Rolling Machines
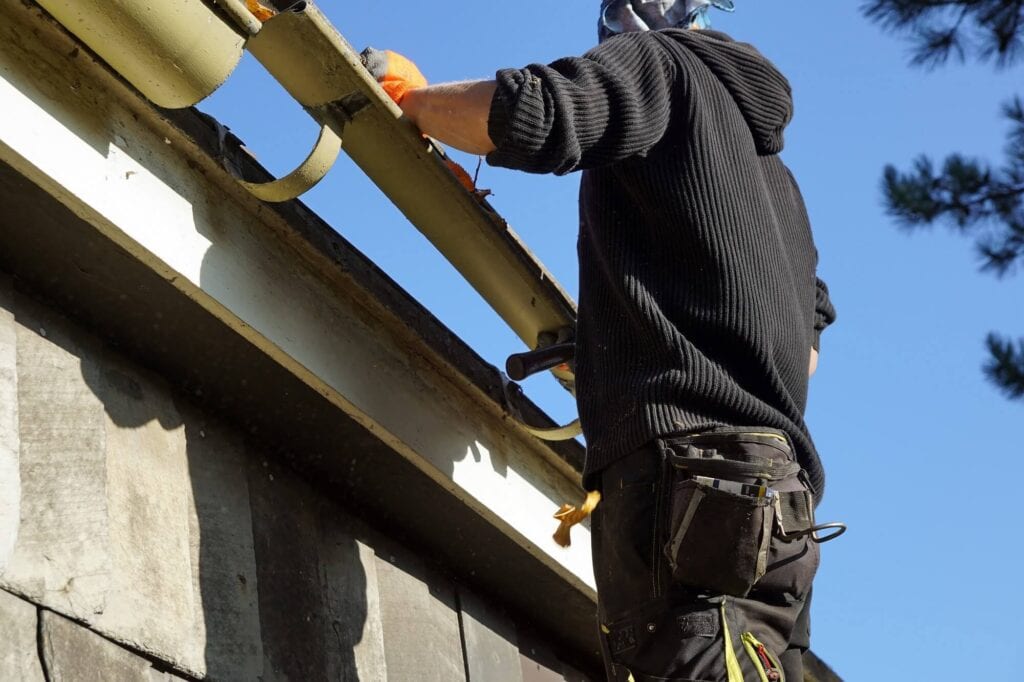
The installer cuts the run to fit the roof edge exactly, with no joints along its length, and the metal is handled carefully to prevent dents or kinks. Joints belong away from the places where the most water flows, such as outlets and valleys, and rivets should be placed to pull the pieces together evenly.
Hangers, Brackets and Holding Power
Spike and ferrule systems are an older method, but they can loosen and are less common now, and the hardware should match the metal of the trough. Straps and brackets hold downspouts to the wall, and they are placed near the top, the bottom and along the run, and a bracket every few feet keeps the pipe true.
Outlets, Elbows and the Path to the Ground
An elbow at the bottom turns the water outward, and an extension carries it away from the foundation, and each section is positioned so that water flows downhill into the next. Where a downspout connects to an underground drain, the joint must be tight, and the pipe should be clear and sloped, and clean-outs make it easy to clear the pipe later.
Corners, End Caps and Outlet Cuts
Rivets and screw heads that pierce the trough should be sealed so water cannot seep around them, and a neat bead is a sign of careful work. Drip edge guides water into the trough, and its lower lip should sit over the back of the gutter, and a thoughtful finish is a detail that lasts.
The Hose Test and the First Rain
Downspouts are checked at the bottom to be sure that water is leaving freely and flowing away from the wall, and the test is a simple way to prove the work. Look at the ground below the downspouts to see that the water is moving away from the foundation, and a brief check after a few storms is a sensible habit.
Planning for Heat, Rain and Wind
Very hot weather makes metal expand, so lengths are cut with that movement in mind, and a crew that reschedules for the weather is looking after the quality of the job. Gutter work does not usually require anyone to be home, though a short walk-through at the end is helpful, and good communication is part of a smooth job.
Approvals Worth Asking About
Most gutter installations do not need a building permit, but local rules vary and should be checked, and a short call to the right office usually settles the question. Changing where water is sent, such as adding a buried drain, may involve rules about runoff, and checking is quick and prevents a delay.
Shortcuts That Show Up in the First Storm
Fasteners driven into soft or rotted fascia pull out, so the board must be sound before gutters go up, and these errors are common but entirely avoidable. Skipping drip edge or flashing lets water run behind the trough and rot the board, and a final inspection catches most of these problems.
Looking After New Gutters
Clean the new gutters after the first few weeks, when sawdust, shingle grit and early debris may collect, and the notes will help if a repair is ever needed. Guards or screens can be added later if debris is a concern, but they must suit the gutter and the roof, and an installer can recommend what suits your situation.
Complex Rooflines and Two-Story Houses
A house with several rooflines needs a gutter plan that treats each section on its own terms, and a short run is often well served by its own downspout. Roof-to-wall joints may need a kick-out piece that turns water into the gutter and off the wall, and a small metal piece can protect a large section of wall.
Why Gutter Work Is Not a Casual Weekend Task
Power lines near the house are a hazard, and metal ladders should never be used close to them, and a stable footing matters more than speed. Sharp edges on cut metal can injure hands, so gloves and eye protection are standard, and a short safety briefing is routine on a good crew.
Why Timing Matters on a Larger Project
Painting the fascia is easiest before new gutters go up, since the board is bare and accessible, and temporary measures may be needed if the schedule changes. A plan that looks at the whole exterior ends with a house that works and looks right, and finishing in the right order leaves fewer loose ends.
Planning Gutter Installation in White Settlement Texas
Homeowners thinking about Gutter Installation in White Settlement Texas can reach J. Riley Roofing & Gutters at 940-456-9905, and the steps are explained before any decision is made.