
Gutter Guard Installation in Saginaw Texas, One Section at a Time
J. Riley Roofing & Gutters installs guards after cleaning the trough, checking the slope and measuring each run, and the finished covers are tested with water.
Call 940-456-9905, and the steps will be explained in plain terms.
Getting the Gutters Ready First
Downspouts are flushed with a hose to be sure that water leaves freely and no plug is hiding below, and skipping this step is a common reason for poor results. Any rust, holes or split joints are repaired or noted before they are hidden under a cover, and a small repair now avoids lifting the guard later.
Sizing a Guard to the Trough
The profile matters too, since a cover made for a K-style trough will not sit correctly on a half-round one, and the figures are written down so nothing is guessed. Guards are chosen to match the debris on the roof, the pitch of the slopes, as well as the way the gutter is attached to the house, and pairing the guard with the roof is the main point.
Covers That Grip the Gutter Itself
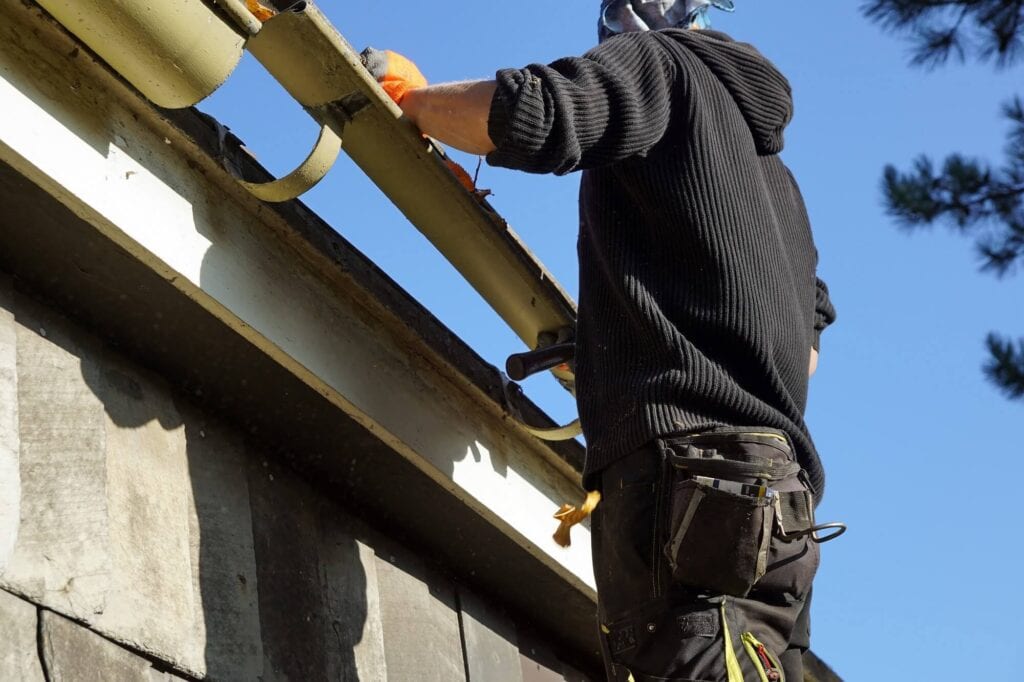
Adjacent sections are butted together or overlapped as the product directs, leaving no gaps for debris, and a rubber mallet may be used for a firm seat. A gap at the back lets debris collect beneath the cover, so the seat against the fascia is checked closely, and slotted holes allow the cover to expand and contract.
Coordinating a Guard With the Roof
Care is needed in cold weather, when shingles are stiff and can crack, and in hot weather, when they are easily scuffed, and the guard must rest at the right angle to shed water. Shingles that have curled or cracked at the edge may not seat properly over a guard, and a careless install can cause a leak where none existed.
Screw-Down and Fascia-Mounted Covers
Screws should be of a corrosion-resistant type that matches the metal, to avoid rust streaks and electrical reaction, and fasteners should not protrude into the water channel. The finished cover should line up with the roof edge and look straight from the ground, and every bracket gets a final check.
Shaping the Cover to Every Feature
End caps and ends of runs are closed off so that nothing can slip behind the cover, and a template can be made from a scrap piece. Valley corners and places where roof water arrives in force may need a splash guard on top of the cover, and offcuts left on the roof can rust and leave marks.
Clearing Obstacles Along the Run
Straps that wrap around the gutter can interfere with the cover, and a different method of support may be needed, and there should be no gaps beneath it. Some covers need hangers moved or replaced with a low-profile type, which is normal work during an installation, and a custom cut may be needed.
Walking the Run After the Cover Is On
Gaps at the back, where the cover meets the roof or fascia, let leaves and seeds slip into the trough, and a tap along the run reveals loose sections. Corners and outlets get a second look, since they are the places most likely to need touching up, and the run can be photographed for your records.
Testing the Covers With a Hose
Downspouts are watched at the bottom to make sure the water is flowing freely through the new system, and the homeowner can watch from the yard. The installer may recommend a closer look after the first heavy storm to see how the covers perform, and photographs of an overshoot help to explain it.
Long Runs, Expansion and Temperature
Screws set in slotted holes let the cover slide slightly as the temperature changes, and the gap sizes are small but they matter. On a hot afternoon, a cover may sit differently than it will on a cool morning, and checking the work in another season is a good habit.
Different Gutters, Different Details
Half-round and box gutters need guards made for their shape, and the standard type will not do, and the type of trough is noted at the survey. Custom work on an unusual roofline takes time, and the installer should describe it before starting, and honest advice about the limits saves frustration.
Why the Work Is Done by People Who Do It Daily
Power lines near the house are a hazard, and the ladder should be kept well away from them, and the ladder is moved often to avoid overreaching. Homeowners should stay out of the area below the work, and children and pets should be kept indoors, and the crew should be careful with windows and screens.
After the Installation: A Final Walk Around
Product details, such as the type, size and color of the guard, are noted for the records, and a note about the date of the installation helps later. Listen for rattling in the wind, which suggests a loose section that needs another fastener, and the covers should serve the house for many seasons.
How the Guards Look Once They Are On
Samples held up against the house in daylight show how a finish will look better than a catalog photo, and the appearance is a matter of taste as much as of function.
Scheduling the Installation
Strong wind makes long covers hard to handle, and wet metal is slippery, so crews wait for better conditions, and the schedule is easier to meet when the gutters are already clean.
Doing It Yourself or Having It Done
Many homeowners decide that the ladder work is better left to people with the equipment and the habits for it, and the choice is a personal one.
Planning Gutter Guard Installation in Saginaw Texas
A call to J. Riley Roofing & Gutters at 940-456-9905 is the first step toward Gutter Guard Installation in Saginaw Texas, and the work can be scheduled around your plans.